October has a way of filling every spare minute. If Halloween activities are part of your classroom plans, keep your centers familiar: look at a picture, talk about a word, make something, and put it away. A seasonal change feels special without requiring children to learn three new routines.
These Halloween literacy centers work well as choices across a week. Set out one first, model it, and add the next when children can manage the materials independently.
A picture-word center with a reason to talk
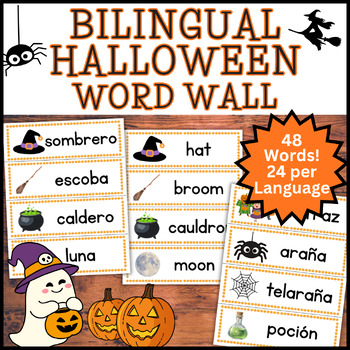
Choose six cards from the English and Spanish Halloween Word Wall Bundle. This is a handy find for a picture-based writing station. The set includes 24 matching words in each language, so you have room to change the selection later. Display the languages side by side if that supports your learners.
Partners choose a picture, say the word, and use it in an oral sentence. On plain paper, they can draw their own scene and label one detail using the card. For children ready to write more, ask for a sentence that tells where the object is.
Keep the first set small. A crowded table of 48 cards is a lot to sort through when you are also trying to help a reading group.
A coloring choice that leads into writing
The Bilingual Halloween Coloring Pages include 20 pictures in English and matching Spanish versions. Put out two designs and let children choose. After coloring, invite them to add a label, dictate a sentence, or write a short description on separate paper.
Try “My picture has…” for beginning writers. More confident writers could describe a sound their scene might make. The English word scramble included in the set is an extra option for children who can already manage the vocabulary.
A quiet finish with a partner explanation
Keep the three Halloween mazes in a finished-work tray. Children trace a route with a finger before using a pencil, then explain the path to a partner using words such as past, around, and toward. Check the zombie, witch, and vampire designs against your classroom’s Halloween plans before choosing a page.
The two-minute setup that helps tomorrow
Put a finished example beside each tray and show exactly where completed work goes. Keep pencils and crayons nearby. Tomorrow, change the pictures while keeping the directions the same. That familiar routine is what makes a themed center manageable.